Article
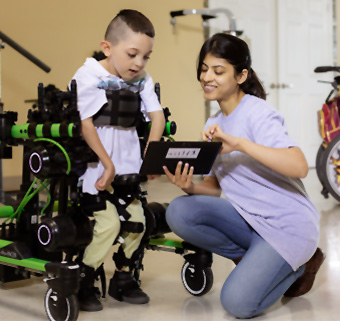
Transfer into the Pacer Gait Trainer
Anterior Position and All Prompts
| February 2006Selection of Gait Trainer Chest Prompt
Correct sizing of the gait trainer chest prompt is important. The small chest prompt fits chest circumference 14-28 inches; medium fits 22-40 inches, and large fits 28-50 inches. Using the medium chest prompt for any person with up to 40-inch chest circumference (with the narrower straps on the medium chest prompt) will make it a firmer and tighter fit. The medium chest prompt fits onto any Pacer Gait Trainer frame.
Gait Trainer Position Prior to Transfer
- Lock the Casters. You may want to position the anterior portion of the Frame against a wall for heavier users.
- Attach the prompts on the Gait Trainer Frame. Place the clamps on the inside or outside of the frame depending on the width needed. Choose each clamp position along the top bar, selecting placement relative to the other prompts, to customize for the needs of this user.
- Top bar of the frame at waist height
- The top of the Chest Prompt below the axilla (to avoid pressure at the armpits)
- Arm Prompts at elbow height
- Make sure Thigh and Ankle Prompts are secured in place
- Decide where to attach the anterior straps of the Hip Positioner, for example to the Chest Prompt posts, Arm Prompt posts, or any secure position on the top bar.
- Unfasten both rear Hip Positioner straps so that the Hip Positioner hangs down. Undo the Arm Prompt, Thigh Prompt and Ankle Prompt straps.
Chest Prompt Position Prior to Transfer
- Open the back pads on the Chest prompt. (The front pads are joined by the containment strap.) Loosen the wing knobs on the clamps, adjust the position, and secure the knobs to set a good width. Adjust the straps of the front pads as tightly as possible to form a firm anterior support. Be sure that the chest prompt height and rotation on both left and right sides are the same, so that the pads overlap. The Gait Trainer Chest prompt should be a u-shaped form for the transfer. Again, make sure that the hip positioner is placed well for appropriate trunk and pelvic positioning.
Transfer Into The Pacer Gait Trainer
- For the transfer: When securing a user in the Pacer prompts, it is important to remember: “CENTRAL” before “PERIPHERAL”:
- Secure the Chest Prompt: Overlap the back pads. Put the pad without the strap against the persons back. Next overlap the pad with the straps, and tighten the lower strap first. Then tighten the upper strap so the user is comfortable and adequately supported. (With the chest prompt firmly and securely tightened in this way, many children/adults do not even need the hip positioner as the upper body is so firmly supported.
- Bring Hip Positioner between the legs and clip on the posterior straps.
- Secure forearms in the Arm Prompts .
- Adjust the length of Hip Positioner straps and adjust the height of the posts to place the user’s pelvis at desired position.
- Fasten the straps of the Thigh Prompts and the Ankle Prompts.
Assessment of User Position & Further Adjustment
- Now assess the user’s position. To obtain the ideal positioning for the Chest Prompts, Hip Positioner, and Arm Prompts, it may be necessary to alter the clamp positions on the top bar of the frame. Transfer the user out of the Pacer Gait Trainer before loosening knobs and altering the prompt clamp positions.
- It is possible to make some adjustments in place, for individual prompts, while the user is in the Pacer:
- Adjust tilt and width of the Chest Prompt if needed, and further secure the anterior and posterior Chest Prompt padding.
- Adjust the Arm Prompt height, rotation, and forward-back position with the one-knob adjustment under the base of the Arm Prompt. If necessary, remove Arm Prompt to change the position of the Arm Prompt Post.
- Adjust the height, angle, and strap length of the Thigh Prompts to guide the stride of the user.
- Adjust Ankle Prompt straps and spring adjusters to control scissoring and step length.
- Select desired functions for each caster: Uni-directional lock, drag feature, and/or ratchet control.
Transfer out of the Pacer Gait Trainer
- When transferring a user from the Pacer it is important to think “PERIPHERAL” and then “CENTRAL.” First lock the brakes on all the Casters. Then unfasten the Ankle, Thigh, and Arm Prompt straps. Lastly, unclip the posterior straps of the Hip Positioner and the Chest Prompt, and provide the user with assistance to transfer out of the Pacer.

More from Gait Training


