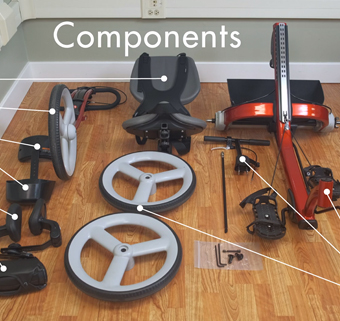
Features of the Rifton Adaptive Tricycle
Michelle Meier, PT, DPT explains the features and positioning options of Rifton’s Adaptive Tricycle, and its therapeutic benefits.
[00:00] Introduction
Here is Rifton’s Adaptive Tricycle.
This is the large size for users up to 310 pounds, with an inside leg length up to 38 inches, which is equivalent to the height from the pedal to the seat.
Top Features and Components
[00:13] Transfers
For larger riders, transfers onto the trike are key; the less time it takes, the more time we have for cycling. This tricycle is designed to make transitions as simple as possible. The handlebar moves away from the seat as it lowers, and we can flip it out of the way. You can also see that the center bar has enough clearance for a lift device, like the Rifton Tram, to roll right underneath. These laterals swing away for better access from the side, and the abductor comes off easily for leg clearance.
[00:43] Seat Height Adjustment
One important feature is the seat height adjustment. The seat and backrest slide on a low-friction rail, so by squeezing this trigger we can move the seat up and down easily. The latch mechanism is secure and durable, so if the rider has enough leg strength to help out, it’s not hard to raise and lower the seat while they’re on the tricycle. So for someone with spasticity or contractures, you might start with the seat in a lower position for comfort, and then raise it as their knee extension range increases during the session.
[01:16] Wheels and Drive Belt
The wheels are sturdy and puncture proof; they’re made of solid polyurethane foam. And the carbon fiber drive belt will not rust or stretch. It’s maintenance free and will last at least five times longer than a bicycle chain.
[01:31] Pedals
The pedals are direct drive with a one-to-one gear ratio. And if the rider can’t pedal on their own, the caregiver can push the tricycle to get the pedals rotating for passive range of motion, and then progressing to active-assisted and active range of motion. Now, while we’re talking about pedaling, I’d like to show you the adjustments on the pedals. We can loosen these knobs to move the sandals forward and backward on the pedal crank. For a rider with strong extensor tone, we might put the axis of rotation under the ball of the foot to maximize the force from their plantar flexion tone with each pedal stroke. Or we can move the sandal forward. This string keeps the pedals level when the trike is not in use. The straps can be attached anywhere around the edge of the sandal. For a less involved user, we can remove the sandals to reveal a standard bike pedal underneath.
[02:24] Variable Resistance and Parking Brake
The brake has nine different positions to set resistance for strength training, or just to slow down speeders a little bit. In the top position it’s the parking brake, so be sure to set it whenever getting on or off the tricycle.
[02:39] Basic Configuration
The large size comes in blue, red, teal, black and white; and in this simple configuration, with no optional components, it’s an excellent bike for people on the autism spectrum or those with intellectual disabilities.
[02:56] Seat
The large seat provides sitting stability for people with poor balance. It’s contoured to create a sensory boundary around the hips and buttocks, while allowing for free range of motion and hip extension during cycling. And every trike comes with a seat belt.
The seat can slide forward and backward, also while the rider is on the tricycle; and this adjusts the hips and knees relative to the pedals, which can be a game changer. Some people use their extensor tone to propel the tricycle, so they cycle best with their hips and knees more extended and their plantar flexion tone in effect powering them forward. Others have better success pressing their feet downward with cocontraction of the quads and hamstrings. So we might move the seat forward to place their knees directly over the pedals.
[03:50] Back Support: Backrest Pad
There are two back support options. You can choose a simple backrest pad with a chest strap – and this is suitable for children with mild motor delay, Down syndrome, attention deficit disorder, or those on the autism spectrum.
[04:04] Back Support: Trunk Support
The other option is the trunk support with a butterfly harness, which offers a lot more stability. Both back supports can slide up and down on these tubes at the back. And we can set the backrest angle to vertical, a 7½° recline or a 15° recline. A reclined backrest decreases the hip flexion in sitting for people who can generate more power in that position. And backrest recline, in combination with a headrest, can also improve the rider’s head control.
[04:33] Handlebars
You can choose the conventional or loop handlebar. This knob adjusts the handlebar height; and it comes closer to the user as it gets higher.
[04:44] Rear Basket
The rear basket also comes with every tricycle; and it’s permanently fixed in place. It’s useful for storage and errands.
[04:52] Transport
For transport, if we lower the seat and flip the backrest down, and then lower the handlebar, it will fit into most minivans. To make it even smaller, we can remove the front end like this, and we can remove the rear wheels like this.
Optional Components
[05:09] Caregiver Handles: Rear Handles
Now we’ll look at optional components. There are two styles of rear handle for caregiver assistance. The basic is the push handle, which attaches here at the back behind the seat. You can get it with or without a handbrake. The other option is the rear steer. It looks similar, but it’s connected to the main handlebar so you can help the rider steer. It also has the option of a handbrake.
[05:34] Caregiver Handles: Front Guide Bar
This is the front guide bar. We can use it to guide the tricycle from the front while face to face with the rider. Some more involved riders may benefit from encouragement and assistance from a caregiver out in front of them.
[05:48] Stationary Stand
The stationary stand elevates the back wheels of the tricycle; and this same stand works with all three sizes. You just put the rear axle in the correct slot. This turns the tricycle into a stationary exercise bike; and it can be very effective for people on the autism spectrum or for those with intellectual disabilities – especially in bad weather, or where space is limited. As the leg muscles move through the cycling motions, they are flexed, extended and stretched. And we can set resistance for even more strengthening. The stand also fits nicely in the rear basket.
[06:25] Pelvic Harness
Now let’s look at positioning options. We’ll start with the pelvis and the lower extremities. In place of the seat belt, we can use the pelvic harness. These two straps wrap around the proximal inner thigh, and they stabilize the hips to the back of the seat. And this gives a stable and comfortable base for postural control. This way the individual can put a lot more of their physical effort into pedaling rather than controlling their position on the seat; and this is really helpful for those with extensor spasticity who easily end up in sacral sitting.
[07:00] Abductor
The abductor is designed with substantial width, which not only prevents scissoring but also maintains the hip in a near-neutral alignment. These index markings allow you to document the depth replacement. The pad is tall enough to give support as the rider’s knees move up and down while pedaling.
[07:17] Abductor with Adduction Straps
Another option is the abductor with adduction straps. You need to choose this at the time of purchase, as the abductor needs to have these rods to attach the adduction straps. The straps fasten around the user’s thighs, and they slide up and down on the bars during the pedaling motion. This gives a comfortable lateral boundary for the client’s knees, to prevent the legs from splaying outward.
[07:45] Pedal Raise Kit
Moving down to the feet, there’s a pedal raise kit consisting of two ½-inch blocks. This allows you to accommodate for a leg length discrepancy. The block can be placed, either one or both of them, between the sandal and the pedal underneath the foot of the shorter leg.
[08:02] Trunk Laterals
Next let’s look at positioning components for the trunk, head and the upper extremities. If you choose the trunk support, you can add these trunk laterals. They slide in tracks on the back of the trunk support; and you can move them up and down, in and out, and adjust the angle. The laterals adjust independently of each other, so we can accommodate for a rider with asymmetries like scoliosis or a trunk lean. The laterals can also swing away for transfers.
[08:32] Headrests
And there are four styles of headrests. This contoured headrest adjusts vertically with this button; and we can move it forward and backward and set the angle with these two knobs. This flat headrest has the same adjustments. The winged headrest also offers adjustable lateral support with these side pads; and we can also swing them back to make a wide, flat headrest. Last is a simple contoured headrest that adjusts only up and down.
[09:01] Hand Anchors
For riders who have difficulty maintaining their grip on the handlebar, we can use this comfortable hand anchor. We secure one end around the individual’s wrist and then bring the anchor up and over to secure the other end. This will hold the hand onto the handlebar in the gripping position. And we can use this on both styles of handlebar.
[09:21] Rider Handbrake
There’s a front handbrake that can be ordered with either the conventional or the loop handlebar, to give the rider control over their speed while they’re riding. And it has a locking button, so that someone who is a bit more independent can safely stop the trike and lock it to mount or dismount. And the handbrake can be either left-handed or right-handed. The brake needs to be factory installed.
[09:44] Device Mounting Bar
Many children use a communication device. Here’s a mounting bar for attaching their device. Then we use a standard handlebar mount to hold the device.
[09:55] Front Basket
And this front basket is in easy reach of the rider; and it’s great for storage of small items like a water bottle or sunglasses.
[10:03] Outdoor Cover
Finally, the outdoor cover. It’s weather resistant for storing your tricycle outside.
[10:09] Conclusion
Thanks for staying with me as I reviewed the features, positioning options and therapeutic benefits of the Rifton Tricycle. Please don’t hesitate to reach out to sales@rifton.com with any questions you may have.

