The Seated Transfer
Rifton TRAM video 1
The Rifton TRAM combines three powerful functions in a single, compact, ultralight device: seated transfer, sit-to-stand lift, and gait training. This short step-by-step guide demonstrates how you can quickly and easily transfer your client in the seated position. Because the TRAM uses no sling, it’s ideal for toilet transfers.
Watch more videos in this series:
Rifton TRAM video 2: The Sit-to-Stand Lift and Gait Training
Rifton TRAM video 3: Using the Forearm Supports
Rifton TRAM video 4: Using the Swivel Locks
Rifton TRAM video 5: Using the Scale for Weighing and Off-weighting
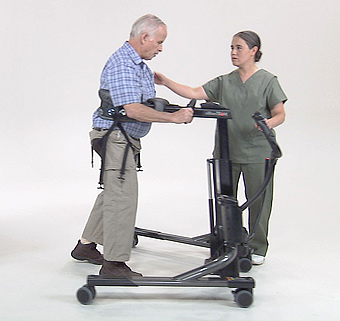
Narrator: With proper use, the Rifton TRAM can eliminate caregiver lifting, reduce back strain and workplace injuries, and give dignity and safety to the client. Here we will demonstrate the appropriate technique for a seated transfer. Proper positioning will ensure your client is comfortable and secure.
Visual: Caregiver standing at TRAM, client seated in manual wheelchair.
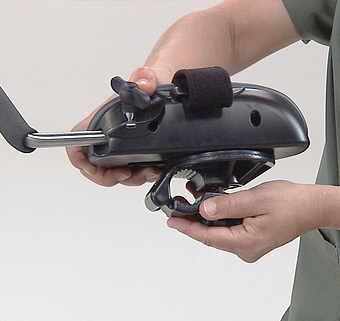
Narrator: Attach the thigh straps onto the two yellow clips at the front of the body support, grey side facing the client, and adjust evenly. If possible, remove the armrests from the wheelchair for easier access.
Visual: Close-up of thigh straps being attached to yellow clips.
Narrator: As you approach your client, explain reassuringly what you will be doing. Having your client relax is so important for your first lift to go well.
Visual: Caregiver reassuring patient; close-up of thigh straps being attached to yellow clips.
Narrator: The body support system should surround your client well below the armpits, but above the hips. When in position, lock the brakes.
Visual: Caregiver demonstrating appropriate fit of body support system and locking brake.
Narrator: Buckle the rear strap and tighten, bracing your free hand against the body support to ensure a very snug embrace.
Visual: Caregiver demonstrating buckle and tightening.
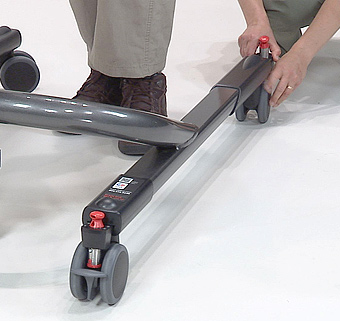
Narrator: Lifting your client’s leg gently, bring the strap under the thigh and back to one of the side clips. The farther back you clip the strap, the more support you give your client during the transfer. Take a moment to gently work the strap back under the thigh as far as possible.
Visual: Demonstration of clip and adjustment.
Narrator: Repeat the step with the other leg.
Visual: Caregiver repeating the step with other leg.
Narrator: Stand behind your client and pull upwards on the adjustment straps evenly.
Visual: Caregiver pulling straps from behind.
Narrator: Maintaining eye contact and reassuring conversation with your client, proceed with your lift. If your client appears to sag uncomfortably, lower back down gently and adjust the thigh straps, sliding them further back.
Visual: Demonstration of improper position/lift. Close up on improper thigh position.
Narrator: When your client is positioned properly the thighs should be parallel to the floor.
Visual: Demonstration proper position/lift. Close up on proper thigh position.
Narrator: Release the brakes and proceed with your transfer.
Visual: Patient in transfer is shown.
Narrator: If your client still sags uncomfortably even after adjusting the thigh straps, take a third thigh strap and place it under his seat as shown here, pulling the adjusting straps snugly from behind.
Visual: Caregiver attaching rings on unused clips and pulling them snug from behind.
Narrator: The Rifton TRAM. Award-winning design to help you lift, transfer, and ambulate your clients safely.
Visual: Caregiver hanging MDEA tag on handlebar.
