Rifton Product Demonstrations
with Lori Potts, PT
Watch six Rifton product demonstrations.
TRAM • E-Pacer • Pacer • Mobile Stander • Trike • Activity Chair
TRAM
[00:11] So this one product can do seated transfers and it can also do supported ambulation. We’re very honored today; we have someone from the Rifton design team, as well as he works in product manufacturing, Sam Durgin. And he will be modeling to help us demonstrate how the TRAM works.
So with the seated transfer, the first step is using the thigh straps. It’s above-the-waist lifting, so there’s no preliminary lift to get the student onto a sling. The way we’re going to do this is place the thigh straps initially, and then we are going to secure the body support system right around the student. So we can imagine that in the home setting they might be on a chair or bed. In the classroom setting, they could be on an adaptive chair or in their wheelchair.
And step one will be to place the thigh strap. You may even want to just put the student’s foot right on your knee so you can really get that well underneath. And the idea here is that the thigh strap will in fact be what performs the lift. So we don’t want it too far back. You know what, I might just turn your chair a little. We don’t want it too far back, because they may tend to slide out forward. We also don’t want the thigh straps too far forward; they may tend to slide down and back out.
So here we have the bar that allows us to spread the base legs. Here is the up and down switch on the caregiver handle. We want this body support system as low and snug as possible around the student’s trunk; and yes, you can lean forward, take hold of the handles. We’ll set the brakes.
A good rule of thumb is that the lower part of the body support system is just above the iliac crest, so we really have that low and snug. I’m taking this strap at the back, I’m pulling the strap one way while I push the body support system the other – again, to get that really snug. He can breathe, talk. Another rule of thumb is that if it’s difficult for you to slide your hand between the body support system and the student’s trunk, then it’s certainly tight enough.
Then we have the ring clip, and that is going to secure onto the colored clips on the body support system. Again, choosing either the gray or the blue, so that it’s farther back, will kind of assure that you get a good support surface. And then, we have the front straps which will secure onto the yellow clips in the front. And hopefully that’s visible on the camera, but you basically just bring that right up and clip it in place. It’s possible to also cross them in the case of an individual who might be wider or stockier and you want to kind of contain their legs. But this really is it. I’m just going to secure the straps again. Just before you lift, you really want to make sure that all your straps are snug. If there’s a lot of slack here, you can imagine how the body support system will raise up under their armpits, and they’ll kind of be sagging down on the strap.
So, here comes our seated transfer. And I’m just going to go ahead and press the up arrow. And what we’re looking for is that the thighs are approximately horizontal to the floor and that he’s not either slipping forward or slipping back. And yes, it’s definitely going to secure him in place.
Now for the supported ambulation, we have three sizes of walking saddle; and I’ll just take the middle-sized saddle here. The straight flat portion is what will go toward the back of the seat, and that’s going to be doing the weight-bearing assist. And then the front straps come between the legs. So as you’re setting that on your seating surface, you don’t want it all the way back, you want it a little forward – because the ischial tuberosities is what will be supported there.
So to use the walking function of the TRAM, we will need to find some way to get that walking saddle underneath. In some cases, you may be able to just do a partial supported sit-to-stand and slide it under. In other cases, you would actually do the seated lift to get that underneath him.
So now we’re going to go ahead and remove the thigh straps. There’s a nice little triangle plastic that you can just pull on to lengthen the strap; and it makes it easy to then unclip that. So we’ll do that on both ends. Notice that I placed it with the gray side up, so that smooth surface is up for making it easy to slide under and slide out. Okay.
For the walking saddle, we will use the clips along the side of the body support system. So only the thigh straps use the yellow clips at the front. Typically, you’re just going to bring that strap up to the closest clip and secure it; and that’s going to be your weight-bearing assist.
The very first time that you get an individual supported in a standing and walking position is a bit of trial and error, because you have those four clips where you could attach the straps. You’re going to take a look at the positioning; and if you need to reseat him to reconfigure, you can do that. And then you can document after that first time what works.
In this case, I am just bringing the front straps around the inside of the thigh to the adjacent clip. So I have the front ones on the white, and the back ones on the blue. And what we’re looking for as I bring him up into a standing position, is essentially shoulders over hips, over knees, over feet. We want to avoid a posterior tilt of the pelvis, and kind of flex paddling of the limbs. We want to aim for a more anterior tilt of the pelvis for good walking.
So as I bring him up to stand, I’m going to draw the device forward, encourage weight bearing through the feet, encourage somewhat of a forward leaning position, and get him supported into standing. It moves quite slow, you can kind of monitor how it’s doing. And then we can close those base legs and encourage the walking. How does that feel? (Good.) Definitely no fall risk, you’re going to be fully supported. And yeah, let’s just have you walk a little more.
So the whole device weighs about 70 pounds, and it’s very maneuverable. You could provide the guidance from the front. And the rear wheel, the rear caster does have an optional direction lock, which I can set in place for assisting the steering.
I would be interested to see how you would do with the clips a little farther back and crossed. So, we’re just going to try to reconfigure and see if we get a better standing position. If you notice, his feet do tend to be a little forward of his hips the way that we have it configured now. Okay.
So I’m going to go ahead and try crossing the straps. I’m actually going to bring the front strap all the way to the gray, and just see if we can get a bit more of an anterior tilt. If that doesn’t work, we might need to try something else. Okay, so see if we can kind of get your shoulders forward of your hips as you come up to stand; and get some weight bearing in more of a hip extension position. Okay, might be a little better.
He gets assistance to get into the standing position. And we can even use the scale to determine how much weight he’s putting through the device; so it becomes somewhat of a weight-bearing assessment. With the student’s permission, I might just lift you right off the ground momentarily – and then I can zero it. And then as I set you down, the number that you see there is a negative number, and that’s the actual amount of weight he’s putting through to the floor. So the larger that number, the more weight bearing he’s doing.
E-Pacer
[12:30] Now that compares to the E-Pacer, which does have the Pacer caster features. So you see it has the same body support system – that same function of assisted sit-to-stand, or lift.
But the advantage here is that we have all four functions of the Pacer caster. So in this case, we can lock it so that it goes only forward and not back – set the swivel lock and set the direction lock, and now it will roll forward but not back. And we can release that to have the full swivel effect. And you can set a drag function on the other side. There’s also an odometer on the front right caster, which is optional, and shows the distance walked. So you have the possibility for data, both with the odometer and the scale.
You will notice that the Pacer caster feature on the base frame makes it a little wider; so this [the E-Pacer] goes through a 32-inch door. This [the TRAM] will go through a 28-inch door. It does also make it longer, so it just is a larger footprint; but you get the benefit of the casters, and you also get the benefit of being able to place the ankle prompt on the base frame. The caregiver handle is part of the product with the TRAM; it’s an add-on accessory with the E-Pacer. So the base price of the E-Pacer is actually a little lower, because you could potentially do your raising and lowering right on the battery housing. And either the switch pole or the caregiver handle is an optional add-on accessory.
I’ll just take a moment to show the arm support options. And what I show you here [on the TRAM], of course, fits exactly the same on here [on the E-Pacer]. We have the possibility of arm platforms which secure with these posts. And these straps are removable, the hand grip is removable if you would just prefer the straight platform. And then we do also have the possibility of forearm prompts, similar to what you see with the Pacer. And with this one knob, we can turn the position so that it can be either farther forward or farther back. And certainly, this post itself can also be placed up or down; and we could even bring it over to the other side for some alternate positioning there. So you can really, you know, do tinker toys and get it to fit as you need for your client.
You could see how this down-and-back position would bring the elbow kind of under the shoulder, whereas a forward-and-up position could bring it quite far forward – either to position the shoulders forward of the hips, or if you’re bracing your arms for that seated transfer. Maybe you’re going to be using this for toileting, and they need that kind of support. So bear in mind that there’s a lot of versatility with your positioning of your arm prompts.
Pacer
[16:35] So now we’ll move on to our Pacer. And what we have here today is the large Pacer, showing some of the newer accessories. And you’ll notice that it is now a modular design, where we have more than one style of upper frame. We have the dynamic, which allows for up down movement and side to side movement. And then we have just the standard upper, which is fixed.
Then there’s also two styles of bases. Here we see the utility base, which is intended for all terrain – everything from grass to gravel to wood chips, just good old outdoor rugged use, very durable.
And then we have the standard base, which has these same casters as we saw on the E-Pacer. So there’s the foot activated direction lock, and the forward-only option; and then the possibility of adding drag for resistance, as well as the odometer, and of course the brake itself.
Okay. Some other newer accessories are the multi-position saddle, which you can see here on both upper frames. That attaches right here with these white buttons. And you’ll notice there’s two buttons with the idea that that will be an added safety, so that it’s unlikely to come out unless an adult is intentionally removing it.
And here we have the angle adjust for the seat or saddle, as well as the forward-and-back adjust. So there’s a bunch of positions. You can really fine tune the position of the hips relative to the shoulders. We also have the hip corral, which can be moved forward as well as up and down, and a nice hip corral strap attached at the back. Then the entire seat can be raised and lowered, so we have the possibility of raising and lowering the upper frame and there’s about 30 pounds of gas assist, about what you have with an office chair.
Here’s the index, so you can replicate where you’ve placed the frame between different users; and then the height of the seat, so the higher it is, the higher the number. And there again, you can document what works for a particular student.
And in terms of the transfer into the Pacer – this also simplifies that as well – because we can lower the upper frame and bring our wheelchair to the back of the frame. And then if our seat is low enough – we might even want to angle it a little bit or draw it a little bit farther back – we can, with the assistance of a second staff member, actually do a very simple forward-slide seated transfer to place them on the saddle. Clip them into place while they’re still in this low safe position, remove the wheelchair. One staff person is behind, another staff person is in front; and together with a student participating and pushing through their legs, we will then raise them into a standing position. And we can fine-tune the saddle position even while they’re on it, to get the positioning we are looking for.
This is a newer chest pad accessory. And you’ll notice that the clamp is part of the component, it’s not a separate clamp. And we can move that back and forth along the frame, and then use this cam lever to adjust the height. And this lever here will adjust the angle. So again, you can be quite specific in where the shoulders are relative to the hips and how much angle there is on the trunk. And that’s just a whole lot easier to situate the student and close the back flap into place.
Another new accessory is the hand hold. There again, a number of different angles; and the single knob here that allows you to move it forward and back. Those compare to our earlier chest prompt accessories. Here you see the medium, which does fit onto the large frame. There’s this flap at the front that closes the flap, and then we can secure this behind. And we can use the knobs up here at the side to adjust for width and for angle as well. And then in this case, the support is much more circumferential, so you can kind of see how that compares to the chest pad.
The chest pad has a large, medium and small, which each fit onto the respective frame. We do not have a chest pad for the XL frame, or for the mini frame. Whereas the large, small and medium can mix and match between the different sizes of frames of the chest prompt – because of this design with the width adjustment, and being able to put the clamp on the inside or the outside of the frame. So that might be for your more dependent user who needs that support all around. In many cases, this is sufficient.
We’ll also just point out the traditional arm prompt, as you remember from before. Now that we don’t have a bar across the whole front, you’ll notice that what you may want to do is put your clamp on the inside of the frame, and point the post inward to kind of bring that arm prompt as close as possible to the center front of the frame. Alternately, we can also choose to have the clamp farther back; so we might have it on the outside of the frame and rather point our hand fold back. And then you can see how this will bring the arm prompt farther back and farther in. Just a lot of versatility, a lot to work with, in terms of placement.
We also have the simple hand loop, and that might be a nice option for the smaller Pacer sizes. Here, we have a small Pacer in pink, and here it compares to the large. So you could use a little hand hold, or you could also use this circular hand loop, or the smaller arm prompt – so some nice options there.
I’m sure you are familiar with or remember the hip positioner and pad; and those are retrofittable onto this new style of frame. I mean you can bring them forward to the new style frame, as well as the walking saddle, which comes in three sizes. And both of those will secure onto these hand loops, which just secure right at the back of the frame. So they have the ring clip or the buckle clip for those.
The only difference between the small and the mini is that the mini has no height adjust; and it has the same traditional U-shaped upper frame. But otherwise, in terms of that, any products that I show are suitable for both.
That said, this MPS is only available on the small, not the mini, because it requires this new style of attachment into the upper frame. So this little multi-position saddle on the small is very similar as I demonstrated on the medium and the large. It has the height adjust and it has the depth adjust and the angle adjust, and then it has this hip corral – which the nice thing about it is that we can, by careful positioning of the chest pad, actually kind of align those accessories to where we almost have like a continuous anterior support for your small kids. So you can kind of see how that seat and chest pad work together. This chest pad is not available on the mini, so the mini would use the old style chest prompt.
Having shown you that, I’m now going to just slide this off so that we can focus more on the seating options with the small.
Okay, so we talked about the multi-position saddle. Now we’ll look at the hip positioner; and that has the clamp which secures the hand hold in place. And the hand hold might point back, it might point forward, it might point in, it might even point out. So that would be your clinical decision for where you need that back ring clip to secure. So this rounded end of the seat is to the back, and this triangular shape is to the front; and that can help with providing a little bit of positioning in terms of not letting the pelvis slide forward. We’re kind of angling it up a little here.
Where you decide to buckle that front strap is up to you – you could do it around the front crossbar, you could do it around an accessory. If we had the chest prompt here you could do it around the upright of the chest prompt or the crossbar of the chest prompt - basically, choosing where to clip that to get the position that you want. So that’s an option for a seat.
Then similarly, we have the walking saddle. And there again, we can place the ring clip on the hand hold; and this will be true for any size of Pacer. In terms of the front strap position – you may really want to do it on that crossbar of the chest prompt with your mini Pacer or small Pacer, because that kind of brings the front straps closer to the back straps.
We could also, if there’s you know, room between the other accessories, we could have this pointing forward, or we could just point it inward once the child is in the device. It’ll be a little harder to get them in that way, or maybe even point them out. If you wanted to have an effect of more of a flat surface with this back strap, so that would kind of just make a nice flat seat almost. So really it’s kind of up to you how you use the possibilities for positioning to secure the seat where you would like it, and where you would need it for that child. So again, that’s the pelvic saddle, hip positioner, or multi position saddle as your options.
So with the ankle prompt, you’ll notice now there’s a style for the standard base and another style for the utility base, because the frame shape is a little different with both those bases. So this is a prompt that is designed specific to this product. You can’t bring this forward from your earlier model. But what happens is you simply press the button on the end and pop it into the hole that’s in the base of the frame.
And then we also have the little spring adjusters that let you determine the stride length; and those are available on the previous model as well. You may choose to have these step near the back of the frame, for a child who tends to overreach and get their feet too far forward. You might choose to have it near the front, in the case of a child who seems to need that cue to bring their foot forward. What will happen is the frame will roll forward and it will give a little press on their ankle and then they’ll take a step; so you can just kind of find the right position to guide the ankle prompt.
Then there’s also the thigh prompt. Both the ankle prompt and the thigh prompt can help prevent scissoring. The thigh prompt actually does not have a right or left. You can put it on either side, and you can put it on the inside or the outside of the frame. And then once you’ve secured it, you’ll use these knobs to adjust for the height and to adjust for the amount of ab- or adduction. And then that can swing freely at the side of the of the student.
The other nice thing about the chest pad is that there’s no protruding upright. Sometimes the chest prompt upright will protrude below the frame. And that way you would want to make sure that your thigh prompt is on the opposite side, so that you’re not getting collision – unless of course you intentionally wanted the chest prompt to kind of stop the movement of the thigh prompt for some reason. But to get it to swing freely, you would have it on the inside of the frame. And it can be a little bit of a juggle to make sure you have room for everything, but mostly you can get it to work.
And one more point to make is that we now offer a communication tray that has two knobs for position adjustment; and that’s because the communication tray no longer rests on that front bar. It has to be secured at the side, which means that we can use these knobs to swing it out of the way, or swing it in front. And here again, you’ll have to kind of make sure it works with the position of the arm prompt if you’re using arm prompts as well.
Mobile Stander
[35:38] So, the Mobile Stander comes in four sizes. This is the medium, I guess you’d say. So there’s a mini, a small, a medium and a large. And for those familiar, it has a nice trunk board which can be raised and lowered to accommodate the student’s growth, or to provide more support in the case of a lower tone student. And then you would lower that support as their trunk control improved.
And we have a nice fleece that just buckles right in place to go around the upper back, or even the neck in some cases – for a student who has severe hyperextension at the neck. And that will just help hold their head forward.
And then we have two sizes of seat pad shown here. The product typically comes with just one seat pad, but you can order two. There are the four clips along the side of the body support that allow you to attach the seat pads in place; so you could have one in a lower position, and one in a higher position, as a back support and a seat support. And by adjusting the lengths of these straps, we can angle the seat pad for more or less weight bearing.
Then we have the knee strap, which is you know, built into the product and basically just holds the legs apart.
And then we have the option for sandals which can be secured into the footboard, and these little ramps to accommodate contracture. There’s a nice mounting bar at the front that allows you to secure either arm props in place, or potentially communication tray. Rarely would you be using both at the same time; but the mounting bar accommodates either of those accessories. And that just slides into the front here with knobs.
The large wheels have their own brake, which is in reach of the student, if they want to be able to brake and release that on their own. The rear wheels have a brake as well. When you have this unlocked, it is possible to pop the large wheels off and then set them on again. So that just makes a nice cleaner, smaller footprint in some classroom situations; whereas these would be used for more of a mobility type of use of the stander. Nice hand rims within reach.
So this is very popular with children with spina bifida; especially at a younger age, it kind of gets them in that upright position. We’ve even had cases where a therapist was were able to justify the use of a manual wheelchair, because the student was so successful in self-propelling with these wheels. It actually gets their shoulder in a better position for maneuvering.
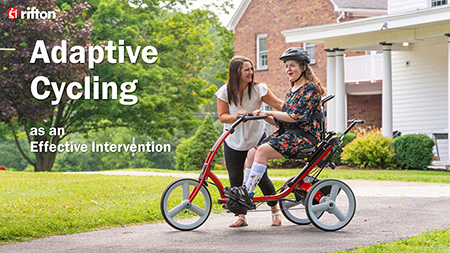
Tricycle
[39:37] So, the tricycle comes in three sizes, and what you see here is the medium.
And here it is with the larger and more improved trunk support. So this is now available from Rifton, and is retrofittable to any tricycles that are out there in the field. It has a nice back support that accommodates the same headrest as the activity chair, three options of a headrest, and it has nice laterals. I’ll just show one of those headrests for your interest.
So this enables use of the tricycle for a very dependent student. Someone who may not even manage to be positioned in a gait trainer and effectively move themselves forward in a gait trainer, can be supportively positioned in the tricycle – and even self-propel and move themselves forward in the tricycle – almost as a preliminary step to future gait training.
So here are the laterals that support them at the sides. Here is a nice butterfly harness which has those ring clips that secure into the backrest support. And the trunk laterals can adjust in width, but in order to adjust them in height you would actually raise and lower the entire backrest.
Then we also now have a rear steer. And that secures again onto the same backrest as our previous tricycles that are out in the field. So it’s retrofittable, same dimensions, and it provides this bar that allows you to secure it onto this front wheel upright and steer from behind – which is really nice for the students, to feel like they’re in charge of the steering, and the adult behind them is not visible and is just giving a little guidance.
Otherwise, we have options for different seats. What you see here is the nice wide stable seat. We do also offer a narrower, smaller seat for children who don’t need that support for sitting stability, and who may get better hip extension on the smaller seat. We also have a very simple low-level backrest. So this would be instead of this configuration, just a simple backrest, and you might have two of them.
Notice that this trunk strap is different than the seatbelt. The student should always have a seat belt secured around their waist.
There’s two options for handlebars as well. So we have the loop handlebar and a more standard-looking handlebar. For the medium, the handbrake is optional. It will always be positioned on the large. The large tricycle will always have the handbrake, but you can choose it on the medium. And the smallest trike does not offer the handbrake. And the handbrake is available with either style of handlebar. For the loop handlebar, it is especially designed so that you can set it anywhere along the loop handlebar, either in reach of the caregiver or the student.
Notice how these two knobs allow us to flip that up out of the way, making access easier for transfers. This also is removable. It’s an accessory component option for leg separation, abductor. This knob here allows us to raise and lower the handlebars; so that’s this adjustment. Whereas this knob here allows us to raise and lower the seat. The higher the seat, the farther back over the large wheels, for reasons of stability.
The foot pedals always come with straps, and you can configure those in either way as is helpful for the student – either crossing the straps, or just looping them around the ankle and around the toe. This handbrake is used for braking, for the transfers particularly.
And we do have a nice stationary stand, which you buy one and it’s usable for all three sizes of tricycle – because depending on the size of the wheel, that is how high you will need to use your slot to get the wheel off the ground. So in the case of this medium tricycle, I’m using that middle slot. And now we can see how the child can just pedal in place, and not actually go anywhere, but get good exercise.
Every one revolution of the pedals matches one revolution of the wheel. So you’re slowing down your fast peddlers and you’re getting good distance for your more disabled students. And you’ll also notice that it's a one-wheel drive; so the pedals are just propelling the one wheel, and the other one is just going along for the ride.
But even as you move the wheel forward, you’re getting that passive range of motion for the student. So that has that benefit. You can be pushing them, and they’re getting that full range of motion whether they’re participating or not. And then as they’re making corners, the fact that it’s a one-wheel drive makes it very safe. Whether it’s on the outside or the inside of the curve, you’re basically never going to see it tip. And it’s also very durable wheels. You’re not going to see those puncture.
So besides the curved, contoured headrest that you see here, we also have the winged headrest. Each headrest, there’s a white button at the back, which allows for the height adjust. And then there’s two knobs that allow for more specific positioning. And this winged headrest, you have two more knobs which support the sides. So we could again, have it in a fairly low position, and kind of angle it so that it’s almost just a continuation of the backrest, for some kids. Whereas for others, we will want to snug it up and angle it quite specifically, to get just that support around their occiput to stabilize their head.
And we can always play with the height of the backrest as well, to get that just where you want it. And then the third headrest is just flat.
Activity Chair
[47:35] Here we have the large standard base, and the medium hi/lo. So anything I show you about the chair adjustment or the components and accessories are available for all sizes, and either base style.
The beauty of the hi-lo base is that we can raise and lower the chair with the child in the chair, just using this simple foot pedal at the back. We can intentionally lower them so that they are pretty much at floor height. There’s a little red lever that allows you to get that last bit of range, all the way down to the floor. That’s just a safety. And so that’s nice, to get them down for enjoying friends and pets and family or school circle time. Whereas the up positions are really helpful for access to cafeteria table, dining table, computer stations.
You get the same range of height on the standard base, but it’s done with these push buttons. And you have the option of a fixed base or a wheeled base, and there’s different leg heights as well. And that’s a more economical option.
As far as the tilt-in-space, there is a nice index on the side showing a 25° recline and a 15° anterior tilt. On the standard base, we actually only get 15° of recline and 15° of anterior tilt.
Another dimension that has adjustment is the backrest angle, and that also has a nice index. It’s important to be aware that if you would choose the dynamic spring, you actually only get the full range when the dynamic spring is unlocked. Once you lock it, that will limit either end of the range. So if you lock it in the forward position, you won’t get the full recline; or if you lock it in the back position, then you will get the full recline, but you won’t get that forward angle – unless you unlock it.
But this is very nice for kids who have repeated extensor tone. It accommodates that and prevents them from sliding forward, working their way forward in the seat. For the standard, we do offer a dynamic spring in the back, and we also offer it under the seat. So we can lock and unlock the spring under the seat and get a dynamic spring in the seat as well.
Other adjustments to be aware of are the seat depth, which is a little white lever here. There’s the backrest height, which is a little lever here. And then the new footboard has a number of adjustments that are very helpful. There’s the gas assist for the angle, and that’s with this little white lever here, allowing us to very simply and easily change the angle of the footboard, in infinite increments.
And then we have foot depth adjust here. And then a bit of a foot angle adjust here; so neutral or slightly dorsiflexed or plantarflexed. Then this knob lets you actually swing it up, and you can do that in combination with having it angled a little bit out of the way – the beauty of that being encouraging your child to place their feet on the floor and step right up out of the chair.
So from there, we will move to the actual positioning supports. Here you see the seat belt, and that secures into a slot on the side. There’s actually two slots available. The little white button here can just be pressed with either a pen or a key to allow you to remove that and slide it into the other slot. On the large chair, we actually have three positions where these seat belts can be placed. Some considerations might be: do you want that seat belt at the proximal thigh, or do you want it up over the ASIS? And consider your seat depth in making that decision.
Now we’ll talk about the other accessories. So for an alternate to the seat belt is actually the pelvic harness. It has that same little metal attachment. Notice this kind of longer, flat end will actually point toward the back when you secure it in place; and you can choose either slot. And then this strap here comes up around the inside of the child’s thigh and buckles for the back of the seat. And that actually really helps keep them well back in the seat; in the case of a child who may have extreme extensor tone, and otherwise tend to move into a posterior tilt, this can be very effective. And this would replace the seat belt. And it’s available for any size of chair.
We also have the butterfly harness which comes in two styles, standard and slim cut. It has the same little attachment to go into one of those slots so you would decide which slot houses the seat belt and which slot houses the butterfly harness. This is a neat little trick here: you can either have your seat belt over the backrest bar or under, and that can make a difference, again in specific positioning for the kid, depending on the size of the child as well. This can be useful for accommodating a G-tube or a baclofen pump; and maybe just fitting the medium chair for a child who’s a little small for it, but will grow into it.
We also have the chest strap and the smaller chest strap, which goes together with the trunk laterals, and here they are. So we can either slide those around the inside to have the straps kind of inside the laterals, or we could feed them around the outside to kind of extend that boundary – and have the child work on their core strength and recovering their center of gravity over their base of support.
Both the chest strap and the laterals attach with a little metal bracket that will go up and down on this track here at the back of the chair. So whether you bring it up from underneath, or whether you secure it down from the top, this gives you your width adjust and your angle adjust and your height adjust. They’re independently adjustable, so that can kind of be helpful in terms of accommodating, or even attempting to correct a deformity.
Otherwise the headrests that we saw earlier secure into this chair as well, and that really kind of gives you a good idea of the supports for the upper body.
The tray can serve as a way to support the trunk as well. We can angle the armrests up, so that we’re giving them that support through their arms where they’re then stabilizing their head themselves.
In terms of the lower body supports, we certainly have the hip guides, which secure right onto the armrests – and that allows for some width adjustment of the seat. And the medium chair accommodates either the small or the large for those. So you can choose. And this little button here allows you to, you know, make a narrower seat width, or widen it as they grow. And in terms of transfers, that slides out quite easily – if you wanted to make a lateral transfer from another seating device.
There’s also the lumbar and seat support kit, with the lumbar pad and seat pad with a waterfall edge where the knees will cross over. And then an intentional sacral shelf so that the ischial tuberosities are held toward the back of the chair. And that can be velcroed right onto the backrest underneath the seat pad.
We have adductors that kind of provide boundaries for the knees, when the kid tends to move them outward.
We have the abductor, which separates the knees, and that just slides into the slot right at the front of the chair.
Sliding into that same slot is an option for a leg prompt, which actually just cuffs just below the knee, and can help to hold the feet, legs together. And that would be in place of the abductor.
We also have ankle cuffs, which now snap onto the footboard, so you would need to get the ankle cuffs specific to this footboard. This footboard is retrofittable to any chair that’s out in the field. And that just slides right down there and snaps underneath. We can lengthen or shorten the cuff to give some guidance to the foot.
Or we have the platform, and that would attach onto any of these grooves on the footboard. We could have it a little bit abducted and externally rotated, we could bring it farther in. We then use this stack and latch system to secure the sandal itself, right on top. You may even want to place that sandal with the heel as more as a toe guard, when the child is beginning to learn to keep their feet in place without the straps.
So again lots of versatility. There’s also the wedge that we can slide – to either add a little stretch to the plantar flexors or to accommodate a plantarflexion contracture. Or we can stack those wedges to accommodate a leg length discrepancy.
There is also an arm support that can be used in place of the armrest, and that actually accepts the same arm prompt as we saw with the TRAM and the Pacer. Sometimes a child will benefit from having a very well secured arm, particularly if it’s very spastic, and that gives them better use of the arm that’s free. Or we’ve also seen both arms supported that way as they work on their head control, while they’re watching a movie or something like that.
There may be a few little accessories we missed here and there, such as the backrest filler pad. There’s also a little strap that crosses the thighs to hold them together. But there’s certainly the reference guide, which lives in this pocket in the backrest pad. That will come with every chair, so you can always refer to that for the adjustments and the details.
Thank you for your time, for your interest; I’m excited for the opportunity to show you these products. They have definite relevance for the school setting and the home setting, so I think you’ll be excited to see them in use.

