 Compared to the school or clinic, the home has unique challenges for gait training with your child: smaller spaces, time constraints, fewer hands available for transfer in and out of equipment and no direct therapy services. Here are some tips and ideas for crafting a gait training session at home. I call them the four “P’s”: Practice, Purpose, Positioning, and Progress.
1. Practice
Practice time may be the single most important factor in gait training. Barring medical contraindications, research tells us that the more time a child spends in an upright position practicing walking, the quicker and more thoroughly he or she will advance. This does not mean pushing a child beyond what they can tolerate, but simply providing the opportunity to be upright and mobile as frequently as possible. The movement does not need to be pretty. It is the repetition of stepping that counts: practice, practice, practice.
2. Purpose
It is even better if we can give gait training practice meaning and devise goal-oriented movement. If you are making the effort to get your child into a gait trainer, find ways to let him or her know their movement has value. For instance: “Let’s go to the garage and find the rakes,” or “Would you like to go to the living room and feed the goldfish?” Doing a purposeful activity rather than walking for the sake of walking is motivating for the child, and motivation is a strong force in motor learning and skill-building as well.
This method can be applied equally to practice of the standing position. Lock all four Pacer wheels and the gait trainer becomes a modified stander. Your child can stand at the kitchen table and roll cookies or stand and watch a favorite TV show.
Kids are smart. They know when gait training is purely a therapy recommendation or a means to a fun and exciting end.
3. Positioning
Positioning your child correctly in the gait trainer can make the difference between walking ten feet or walking one hundred feet. Correct positioning is also crucial in the prevention of pressure injuries or rubs to the skin during gait training. Below are some basic tips for the Rifton Pacer gait trainer. Remember, these are guidelines and do not take the place of direct therapist instruction.
-
Gait Trainer Height
With the Rifton gait trainer, we like to see the height of the top bar of the frame at the level of a child’s hips. Raise the frame slightly higher if the child has contractures at the hips or knees to let gravity help relax them before stepping starts. If the child sags down, don’t raise the frame any higher. Rather try raising the hip positioner or MPS,or make adjustments to the arm prompts to better share some of the bodyweight (explained below). Raising the Pacer too high when the child is sagging onto the supports often results in poor overall positioning and difficulty stepping.
-
Arm Position
 The arm prompt adjustments can accommodate most positioning presentations. Detailed adjustment instructions can be found here, but the most important thing is to position the arms and elbows close to the body. This stabilizes the trunk and shoulder girdle and allows the arms to assist with weight-bearing and weight-shifting during gait.
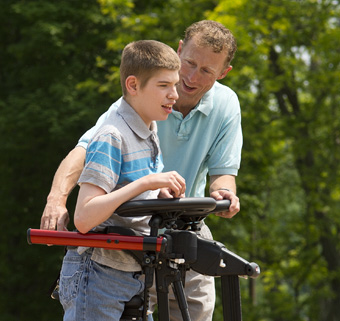
 Having the arms up and out to the sides as seen in the picture is poor positioning. We call this the chicken wing position and it should be avoided, as it puts unnecessary strain on the shoulders and is ineffective for weight-bearing and weight-shifting.
For those that are using a chest prompt with their gait trainer, good arm support placement can often be assessed by looking at the chest prompt position. If a child is sagging into the chest support, or the top edge of the chest prompt is pushing into the armpits, try repositioning the arm supports closer to the body so the child can use them to better support themselves in an upright position. If this doesn’t work, then the chest prompt may be too high or the seat of the gait trainer too low.
-
Forward Leaning Position
This position is helpful for the child who has difficulty with step taking. In this position, stepping is aided by gravity, momentum and the “stepping reflex.”
To create this position, it is essential to understand that the seat, trunk support, and arm supports can all contribute to sharing body weight. Using these prompts, you can position your child into a forward lean.
Move the trunk support so it is positioned slightly in front of the seat, bringing the child’s shoulders forward of their hips. You can tilt the trunk support forward by loosening the knobs that clamp the horizontal bars to the support post. The child may be able to support some of their body weight by leaning on the trunk support.
 Place the arm supports further forward on the gait trainer, still keeping the elbows close to the body for weight-bearing. If the child does not need all the supports, you can still create the forward-leaning position by using a combination of any two out of the three prompts mentioned above.
The Pacer Positioning Checklists available for both the newer dynamic model of Pacer and the older model of Pacer may be useful to help you document and remember which prompt placement and frame configuration works best for your child.
-
Pacer Caster Tips
The Pacer casters can be effectively used to gait train in smaller spaces. Here’s a quick how-to video. If your child tends to extend backward or push the gait trainer backward when walking, try engaging both the swivel and direction locks of the back wheels.
To help with improved steering down narrow hallways, engage either the back two or the front two swivel locks. If you need your child to walk in a straight line down a particularly long corridor, you could even engage all four swivel locks. And if your child tends to veer to one side or the other, try engaging the drag feature on the opposite back caster to help cue the steering.
For more in-depth information, please read “Five Common Gait Training Goals and How to Achieve Them.”
There are also more prompts available for the gait trainer, which can be used to facilitate and support better gait training. Ask your therapist for recommendations.
And finally, remember to check your child after each gait training session at home, especially if you have made some positioning changes. Skin damage can happen quickly, but can also be alleviated with a simple prompt position change or tweak. If you notice skin damage occurring, stop the gait training session and call your therapist.
4. Progress
A great way to encourage gait training progress is to add an element of challenge. Your child can accomplish more than you might expect if given the opportunity. This does not mean pushing them beyond their limits, but rather finding creative ways to advance their walking skills. It can be as simple as increasing their walking distance, encouraging them to walk faster, or walk uphill or over a grassy yard. Engaging the drag function of the back two Pacer casters to add resistance is another way to create some added challenge. And research shows that when there is intensity (challenge) in gait training, children show walking improvements. Again, I want to emphasize that practice and stepping repetition are the most important aspects of a gait training routine. And with practice, some days will be better than others. Overall, remember, the incremental improvements and changes in walking skill will be slow. Lack of obvious progress can be disheartening at times, but it is to be expected. Keep your goals and dreams at the forefront and your child will surprise you.
Finally, along with everything else that needs to be done in the home, providing continued therapy services for your child cannot go underestimated. You and your child are the heroes of today.
Back to Top